Thursday 1 December 2016

A Christmas Angel for you....

Evening all... blimey... is it really nearly a month since I got on and posted to my blog?? Wowsers.. I won't let that happen again in the near future. 

Tonight, I'm sharing with you all a little card I have made for Sue Dix using her amazing Sweet Dixie range of dies. 

They are really lovely dies and cut so well too. I have used a few different sets to put this card together. The main focus though of course had to be the angel, as she is just so pretty!


The Angel herself I cut out of white cardstock and then inked lightly around the edges with London Fog Momento ink as I didn't want anything too harsh. I layered her onto the same cardstock I was planning to use for the layers on my card, the red, and cut around the sleeves and skirt. The wings I decided to use gold mirror card to add some shine. 

I also used the mirror card to cut the lovely holly corners and stars. 


The card itself was an 8 inch card, and the first red layer was cut to a 1/4 inch smaller. The white layer was 1/2 inch smaller. 

I then cut a 6 inch square of red and again, a smaller piece of white. The white layer on this section I decided to use a gorgeous Sweet Dixie stencil, and inked through it with distress inks of different colours. 

I then cut two smaller layers of red and white to put my topper onto. I cut two trees, layered them onto the same colour and inked the edges for a bit of shading. These were placed to the bottom. The angel was positioned at the top of the card and I placed her stars around her. 

I cut out the beautiful flowers and leaves, inked and gelled them up, layered and stuck them into the corner of the card to add a little flourish. 


Once everything was on the card, I used some glitter glue to the centre of the flower, around the trees and on the branches. 

I loved making this card, I hope you like it to. 

Here's a list of what I have used.

Sweet Dixie 6x6" Christmas Kaleidoscope stencil SDST0030
Sweet Dixie Church and Snowy Trees SDD195
Sweet Dixie Holly and Star Corners SDD183
Sweet Dixie Christmas Rose SDD202
Sweet Dixie Christmas Angel SDD194
Sweet Dixie Snowflake Edge SDD190
Tim Holtz Distress Ink - Forest Green, Bundled Sage, Tea Dye
White gel pen
Glitter glue - irridescent
Gold mirror card
Red and white cardstock
Offcut of ribbon

Friday 4 November 2016

Sweet little doves

Morning all... how are you?

Well, I thought I would sit here and share a little quick make from my JoyCrafts shows last week. I got a few messages saying that folks liked this card - and it's VERY easy to make. Probably one of the simplest little cards I've made for a while. 


The card blank was scored and cut to around 15cm square. Then I cut a piece of the JoyCrafts papers to around 14cm square. I sanded down the edges with a file - just a simple old nail file will do this, but you can also use a fine sandpaper if you need to. (Husband's tool boxes come in really useful!)


I took some of the beautiful swirl stamps and inked them up with some brown ink. Brown is better than black as I don't find it quite so harsh. I inked around the left side of the card, I also used versamark to make a lighter pattern on the right hand side. 


I chose some of the brilliant organza JoyCrafts ribbon and created a little double bow and a small strip going down the side of the card. 


To finish the card, I cut out a little frame and inked it over with a brown ink, then filed it back. The doves were cut from the dies that were on the show. These were attached with foam pads to add a little depth. 

I also went around the swirls with a pearl drop to highlight them a little and add some brightness to the card. 

I hope you like the quick card today, or even try to do something similar. I'd love to see it if you do. 

xxx

Thursday 3 November 2016

There are no little dreams

Good evening all.... 

Sorry it's been a while, but I hadn't gotten around to taking pictures of my projects this last few weeks so had nothing to upload. But that's rectified now, and there are a few things to share. 

Anyway... before all of that, how are you? Have you started your Christmas cards? I admit, this year is a first as I've actually made a few. I know.... go me!!

But this last couple of weeks I've been picking and sorting product from JoyCrafts, which will hopefully be coming to a screen near you soon. 

But before that... I just want to share a little demo that I did on my last shows with JoyCrafts on Hochanda at the end of October. We had some really lovely borders and corner, and I couldn't resist having a little play to put this one together. 


You can see that I used the corners to make a sort-of frame around the outside edge of the card. Once I had cut all the corners, I rubbed over them lightly with some pebeo gilding wax in silver to highlight the details a little more. 


The centre of the frame was cut from a beautiful frame that we had on the show - I will check the stock number for you for that. I cut it out, embossed it and again, gave it the Pebeo treatment. The top of it was then wafted over with an antistatic bag and stamped with a sentiment. 

I heat embossed it with silver powder to give it some shine. 

The little swirly bits and flowers were some other items from the show too - all Joy Crafts. All beautiful too. The little fern type die cuts beautifully. 


I really hope you like the card for today. I will be back very soon to show you another card or two that was on the show. 

until next time..... xxx

Wednesday 26 October 2016

Little Angel...

Yes, I'm afraid I'm in full Christmas card swing now... and it's been really lovely to get time to sit and make some, and also share my makes on here with you all. 

So, what have I got to share with you all today? Well, it's this sweetheart here. The cutest little Angel there ever was. You can paper piece her, stamp and colour her, doodle in her, the choice is entirely upto you. 

But on this card below, I chose to colour her in very simply using my new Colourista pens and pencils - and as you can see, they work amazingly well. 


There are a few different things I've used on this card, and I will be sure to list them at the end of the post. 


These fab little sentiment tiles would have been so easy to make had I thought about it, but I didn't, so a random purchase a while ago from Hobbycraft bought them home with me, ready for that perfect card.

So here she is - my little Angel, in all her finery. I will list all details at the end. But as you can see, the base colouring was done by stamping in Momento, as I was using permanent colours to colour in.  
I coloured in using the Spectrum Noir Colourista pencils and pens. I found the pens to be lovely with the brush nib - very precise. And then topped it up with the pencils too to deepen the shades. 


On this pic, you can see where I opted to use the foils that I recieved from Stix 2. These are nice and so easy to use too.... and lovely to enable you to add a bit of luxury. 

So - here's your step by steps etc. 
  1. Take your 8" x 8" card and cut some gold mirror card and patterned paper slightly smaller in layers using your Layer Perfect tool. Stick these together and attach to the card blank. 
  2. Take a contrast paper and cut out with a circle using your Layer Perfect tool too. Really easy to do this!
  3. Cut a strip of gold mirror card to around 2" wide x 7.25" long. Cut a piece of patterned paper to 1.75" wide x 7.25" long and stick together. Wrap a length of ribbon around the whole piece and then attach to the card. 
  4. Stamp your image using Momento Tuxedo Black and colour in with your chosen pens or pencils. Add some sparkle with your Sakura pens. 
  5. If you take your Stix 2 2 in 1 glue pen, draw around the pieces you want to foil and leave to go clear. (It goes on blue - permanent adhesive, dries clear - temporary adhesive) Then pop your foil sheet over the top and rub over to adhere the foil to the glue. 
  6. Cut out leaving a small border, then layer onto a piece of mirror card. Trim to leave a small border. You can measure this very easily using the Layer Perfect. 
  7. Attach the angel topper to your card using Stix 2 silicone adhesive. *I opted to use silicone because you have different depths underneath the topper, so the silicone will adjust the height accordingly*
  8. Finish your card by adding a bow to match your ribbon, a central flower and a board sentiment. I also added a wooden heart and some pearl drops around the design. 


I hope the steps make sense... really, you can just have a play with the topper once you have coloured her in, or paper pieced her. She will look beautiful whichever way you play with the stamp. 

Here are the bits I've used in my card. I would love to see what you have made... please share! xxx

SHOPPING LIST

Stix2 S57321 Layer Perfect Tool
Stix2 S572269 Tape Runner
Stix2 S57109 Transfer Foil
Stix2 2 in 1 glue pen
Stix2 S57100 Silicone Adhesive
Woodware FRS223 Patch Angel stamp
Sakura Stardust pens
Colourista pens and pencils
Momento ink - Tuxedo Black (if using alcohol pens. Stazon if watercolouring)
Dovecraft Winter Blooms paper pack
Hobbycraft Mini Christmas Signs
Hobbycraft Wooden Heart Topper

Friday 21 October 2016

Bauble time....

Morning folks.... 

How are you all doing? Things this week have been a bit busy - not too bad - just sorting out show products for upcoming hours on Hochanda, and also been out and about visiting a very lovely person... but more on that another time!

Today, I thought I would share a little project I've made for Stix 2, and I've used a few other Woodware bits on there... and a little bit of watercolouring. Who doesn't love putting away the alcohol pens and getting back to watercolour. It's such an easy way to start - don't get worried with your colouring with pens, they can be a little daunting... 

So here is the project for today. 


I will give you a full list of what I've used at the end, but I started by stamping the beautiful Jolly Holly stamp with cloudy grey Stazon ink. I used stazon because I needed a permanent outline as I was watercolouring, and I chose Cloudy Grey so it wasn't too harsh against the vintage papers. 

I coloured the stamped image in with Brunzeel Aquarel Expressions pencils - boy, these are gorgeous! They don't leave harsh lines, but if you are in any doubt about any pencils you have, just scribble off the point of the pencil to give you a softer start. 


After I coloured the bauble with the pencils, I took a little darker colour on the brush direct from the pencil and added shading to the side edges. As you can see, there is also a little glitter on there. This was from adding some of the Sakura Stardust pens and painting them out with water to spread the glitter. 

I had stamped two lots of the foliage around the swirl and coloured these in the same way with the pencils. I cut them out so I could add dimension to the finished card with the silicone adhesive. 


I added some shading around the bauble and the swirl by using a charcoal pencil and I blended it out with a paper stump. I chose to add some extra colour to the swirl with a Micron pen, and then used my Stix 2 2-in-1 glue pen along areas of the swirls. I left it to go tacky (it will go clear) and then added some foiling to give it some sparkle. I chose the dark brown foil from the Transfer Foil pack. 


Some finishing touches were the ribbons, flower and greeting board, and I added some already cut paper snowflakes which I had stuck around the card. 

Here's your quick step by step and shopping list. Enjoy!


  1. Cut your base card to 8" x 6".
  2. Use the Layer Perfect tool to cut layers of mirror card to 7.5" x 5.5" and the papers to 7" x 5". 
  3. Use an offcut strip of paper to add the detail down the side, it doesn't matter what width and add mirror and white card down the edges. Stick your snowflakes to the card and trim edges. 
  4. Stick these layers to your card with your Tape Runner. 
  5. Stamp and colour your image as detailed above.  Foil the image if required. 
  6. Add shading around the outside of the image with distress inks if you want a nice vintage look.
  7. Trim to leave a small edge and layer with mirror card and white card. Use Silicone glue to the back of the topper to give height and attach to your card. 
  8. Cut out the remaining leaves and shape with your fingers to give it a curl. Add silicone glue to the back and add to your card. Add some white dots to give details. 
  9. Tie a large luscious bow and attach this, a flower and your sentiment board to the card with silicone glue. 
SHOPPING LIST

S57321 Stix 2 layer Perfect Tool. 
S57269 Stix 2 Tape Runner
S57100 Stix 2 Silicone adhesive
Stix 2 2-in-1 glue pen
S57109 Stix 2 Transfer foils
S57275 Stix 2 Snowflakes
JG5284 Woodware Jolly Holly stamp
White cardstock
Guillotine
Gold Mirror card
Papers (I used Dovecraft Winter Blooms)
Hobbycraft Mini Christmas signs
Stazon ink - Cloudy sky
Brunzeel Aquarel Expressions pencils
Sakura Stardust pens
Sakura Micron pen 0.1


Friday 14 October 2016

Simple and spooky

Oooooh it's been a few days hasn't it?! 

I have had a bit of a busy week getting ready for my first few shows over on Hochanda. And do you know... I loved it. It has such a warm, welcoming feeling there and I felt at home straight away. There were so many familiar faces too, which was lovely. Anyways.. more on that later. 

I have also not been very well - I'm sure I've got the worst edition of Man Flu! It started last week with a swollen throat, developing into a full-on cold and cough. I've not felt so rough for years!! But here I am, and I want to share a little card that I made using this gorgeous little witch stamp I've had in my stash for quite a while. 

Isn't she just the cutest?? I chose to colour her with promarkers on this card, but added some shading with pencils to add a little depth and some shadows under her lovely shoes. 

The extra little bits and bobs in the stamp set - the bats, the moon - I chose to randomly stamp around and then finished off with a black liner pen around the outside edges to keep it simple. 

Wednesday 12 October 2016

Birthday cuties....

Helloooooo y'all... 

How are you??

I've had a pretty busy week this week, preparing for my first ever show over on Hochanda - a little bit nerve wracking but everything was lovely, and the folks there are wonderful. Great atmosphere, familiar faces and a kettle. What more does a girl need, right?

Apart from being busy, I was creating a couple of cards to send off to my beautiful daughter for her birthday. I made two as she has a little furry friend in the family who dotes and loves her to pieces - that is our Scoobs. Her baby. He loves her to bits... but more on that later... 

The stamps I chose to use are Woodware and I chose the turtle and the puppy. The turtle is a private joke from years ago when she was in the air cadets lol, and this stamp is just so perfect. I love it. The little cheeky expression on his face is so cute. 


I coloured him with copics (I can give you the numbers if you need them) and added some shadows and white highlights for details. 


of course, all of my little characters have to have blushy cheeks - it's the law! So, he was given his blush and some white highlights to his eyes and cheeks to add some sparkle. This card was from the grown ups. 

The card below, was from the furbabies. Namely Mr Scoobs. lol. 

I coloured him in so he looked sorta spaniel coloured, and used the same paper pad as above so that the cards matched. The layouts I kept quite simple on both, as I didn't want to deter away from the great images. They make the focal point on any card. 


Again, I used the copics to colour, if you want to know the colours, just ask. I do have them written down. I added sparkle to the hearts, a few dots to the blushy cheeks and eyes and some details along the ribbon and top borders. 


Inside the card, Scoobs managed to 'paw' his little sentiment - yes really, all by his own fair pawsies! He even sent his favouritest person a gravy bone inside the card too. lol. She loved it and it made her giggle. 

I hope you like today's cards... they were so easy to make with the quality of the stamps, and I totally enjoyed getting back into my colouring (something I have missed of late!) 

I will be back soon to share a few more projects with you, but until then, Happy Crafting!!!

Wednesday 5 October 2016

Seasons Greetings from me.....

Hello my little bloggeroonies... 

Something a little different from me today, as I have been playing with a few products that I was sent from the fantastic company of Stix 2. As you may know, they do those awesome adhesives, but not only that... they also do a few things that I've featured on my card. 

So... where to start? Well, this is the card I kmade, and as usual, I started with the background colours of cardstock and papers as I knew I was going to be using a Woodware stamp to create the card. This is one of the easiest ways of choosing your colours - 1. Choose the paper and card colours. 2. Colour your image to match the card. 

On this one, I went for a lovely pale dove grey and slate grey card. The papers were in a new set of Joycrafts designs that I got and the greys matched perfectly. 


I scored my A4 card in half, then trimmed it down to create a square card measuring 15cm x 15cm. The dove grey layer was cut to 13.5cm x 13.5cm. The next layer to 13cm x 13cm. Then the DP was cut to 12.5cm x 12.5cm. From now until the end of the cutting and prepping, nothing was stuck together unless I mention to. I know... bossy right?!

Around the edges of the card and the DP I used the Stix2 Layer Perfect tool to create my sweet dotty pierced border. It makes light work of ensuring everything is nice and level, and that the holes are even. Easy peasy. 

I used the same cardstock to cut my frames. I cut two from the Dove and Slate Grey card and did a little inking and drop shadow work with it. *Drop shadowing is simply where you layer one on top of the other and slide it down and to the side to see both bits of cards, creating a shadow*. 

I stamped my chosen image using Momento ink, Tuxedo Black and coloured with Promarkers. I added a little bit of dark pencil to add extra shadow. Once the colouring was finished, I cut around the outside edge of the image leaving the middle intact. I dusted around with a little distress ink to add some shading. The bow was stamped twice, coloured and cut out then used to add dimension. 


So now comes the fun piece of sticking everything together. I stuck my base layers together, upto the DP and the slate grey it sat on. I glued these together, but didn't attach to the card as I wanted to add the seed beeds and glitter to the borders. I used a little PVA glue and sprinkled them around the outside edge. Leave it to dry to ensure they don't move around. 

Once dry, attach it to the card using the foam pads and add your frame to the centre of the card front. In the centre of the frame, mount your stamped image using foam pads to add dimension and finish off with a little of the clear glaze over the berries. 


I love how the sparkles look... they make a real change from using mirror card. I hope you'll agree. 

Here's the shopping list if you would like it. I hope you like the card as much as I have enjoyed making it. Happy Crafting!!!

SHOPPING LIST

Stix 2 Layer perfect tool (557321)
Stix 2 Seed glitter (57080)
Stix 2 Ultraclear Tape
Stix 2 Tape Runner (red - high tack) (557269)
Stix 2 Craft foam strips (557318)
Woodware Holly Wreath stamp - (FRS102)
Docrafts Outline Stickers - Traditional Christmas sentiments (PMA810907)
Promarkers - Pear Green, Moss, Olive Green, Ice Grey 1.3.5., Red, 
Berry Red, Magenta, Caramel, Cinnamon
Papers and Diecut - JoyCraft!

Thursday 29 September 2016

Little elephants...

Good morning crafty peeps.

I thought I would share my little bag I made last week. I fell in love with the pattern when I saw it at the Bobbin Patch, and must say, I am really pleased how it has turned out.


You can see it has a little quilting on there, the most successful bit I've  done to date. Lol. There is also a little bit of applique on there.
Now, applique is something I learned to do when I was 10 and at junior school, where we were given a crafty project to plan and make. I did applique. Loved it and still do.

Here is the back of the bag. The  theme carries on with the little elephant being stitched on the back.


It was 'sew' cute and a joy to make. I hope you like it too. Xx

Stop focusing on the past.....

Good evening all.... 

After a couple of days of busy-ness, I thought I would sit for a while and share a little post that I found a while ago... don't ask me where, but I copied it and pasted it onto my laptop... and here it is. If anyone recognises it, can you please let me know so I can give credit to the original post?

I really love inspirational quotes. Ones that make you think. Sometimes we can get so wrapped up in the 'moment' that we forget to look at everything else. Focusing on the bad things, and never looking towards the good, the future or whatever it is that you are hoping for. 

I hope that this makes you think about not focusing on one thing, one experience, but looking past the things that hold you up in life and get you where you want to be. 

Enjoy!

Imagine walking through a lovely meadow. The sun shining. Looking up at a beautiful sky. Bright blue, lots of fluffy white clouds drifting by. Butterflies fluttering amongst the buttercups and daisies. Your fingers brushing the tips of the long grass as you walk.....and then suddenly, you stumble.

You manage to catch yourself after faltering for a bit. You dust yourself down, and keep on walking, admiring the beautiful surroundings. You stumble again, this time falling into a deep, unmarked pit. You keep falling and falling, grabbing out and flailing wildly to try and get a grip on something, anything. After what seems like forever, you stop your slide downwards and hit rock bottom. You are exhausted from your sudden and unexpected decent into darkness.

Before you know where you are, and what has happened, you are at the bottom of a deep hole with no idea how you got there or how to get out. You can see a chink of light in the top, but its quite far away, and you cant trust that the chink of light is the only way out, but you claw towards it anyway, even though you are exhausted and bruised and battered from your fall.

Its a lonely time in this hole. Only you and the darkness. You couldnt see anyone else even if they were there, because of the darkness and coldness of your environment. But once you realise where you are, you know you have to clamber out and,` if you are lucky, someone will pass by and offer a hand of help to pull you out.

Despite being exhausted, and bruised and battered, you clamber you way to the top, and you finally make your way out of the hole. Yet you are still shocked and stunned by what happened. How could you miss such a big hole in front of you? Why couldnt you see it coming? How come no-one before you has fallen into this hole (you think) and not thought to block it up? Many people before you has managed to walk through the meadow without falling into this pit, why couldnt you have seen it coming, or prevented it, or just had a better journey?

You are stood, standing in this beautiful meadow, but all you can think about is the dark hole that you have just fallen into and clambered out of, how sore and aching your body is, and how tired you are. The beauty around you means nothing for a while. But you are grateful to be out, and you realise you should appreciate the beautiful surroundings.

You keep walking, but you find yourself no longer admiring the sky, the clouds, the butterflies, the flowers. You are busy looking at your feet. Concentrating hard, because, you dont want to fall into another pit, and waylaid by your aching bones and tired body.

You lose sight of all the beautiful things around you because you are continuing your journey looking only down at the ground, on alert for danger. You dont appreciate the sky, the clouds, the flowers, the butterflies, because you are too scared of falling down another hole, you still have the bruises from the last fall.

You are terrified that, if you take your eyes off terra firma for a moment, you could slip down that hole again and you wont find your way out so easily this time.


It is a long, lonely journey, spent staring at the ground, before you trust your surroundings, and your instincts enough again to appreciate your journey, and realise its beauty. To wander through the meadow staring at the beautiful blue sky and fluffy white clouds.

Tuesday 27 September 2016

Dogs, dogs, dogs....

You know... there's so much that I love about life, I can't begin to tell you.... but when it comes to my furry friends - or not so furry in the case of my goldfish!!! - then dogs and cats have to be up there with the best. Since we have been together, Mr P and I have never been without our furry friends. He had a cat called Lucy when I met him, and she had babies which gave us a large ginger and white tom, called Thomas. Yes, I know... very original

When we married we got our first doggie, a beautiful dobermann called Tasha. She was our baby, but unfortunately she died aged 6months old. A day permanently etched in our memory forever more. 

Since then, we have had a few woofers, a few more cats, as well you know if you are a regular reader of my blog, and we now have three spaniels, two cats and three fish. All very spoilt, but all very loved. 

So when my crafty friend Pamela showed me the Crazy Cats collection of stamps from Tim Holtz, I immediately fell in love and saw some quirky things that our cats did. Albeit, I never had chance to sit and stamp, then colour them in as I had too much 'other stuff' to do. Obviously that has changed in the past few weeks, and I am starting to enjoy my crafting again for me - finding things that I have scurried away for a rainy day.. 

Pamela also showed me her new collection of Crazy Dogs... of course, I had to have them and invested in the stamps and the matching dies for these. I got them from my lovely friend Donald who owns Craft World Scotland, and I must add what fantastic delivery he does too!!! Ordered one day, delivery the next. 

So... these dies were put to one side and last week I got them out and coloured them up. This is what I came out with. Very simple cards, but I hope you like them. 


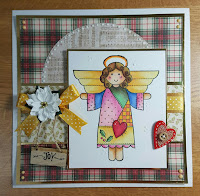
I chose to use some lovely papers from the Santoro pack to have as my base on my card. The layers were cut on my Scan and Cut, which made it so simple to do whilst I got on with the important part of colouring my image! If you don't have the Scan and Cut, I can give you dimensions for the matting and layering, please leave me a comment to ask. 

The pens I used to colour this little fella are Promarkers and they are listed under Single Dog at the end of the post. I chose an olive green ribbon to go down the side of the card and the wording was also cut on the Scan and Cut. Just a simple 'Hello' as I don't often put sentiments on my cards. 


In the centre of the ribbon bow is a button that I got in a pack from Hobbycraft. I just snipped off the back loop from the button (not too close as you don't want the top bead popping out!) and used hot glue to fix it into place on the ribbon. I finished off the little guy with white gel pen and a fine line of blue highlight around to add some depth. I added some Nuvo drops to the corners as my little gems. 


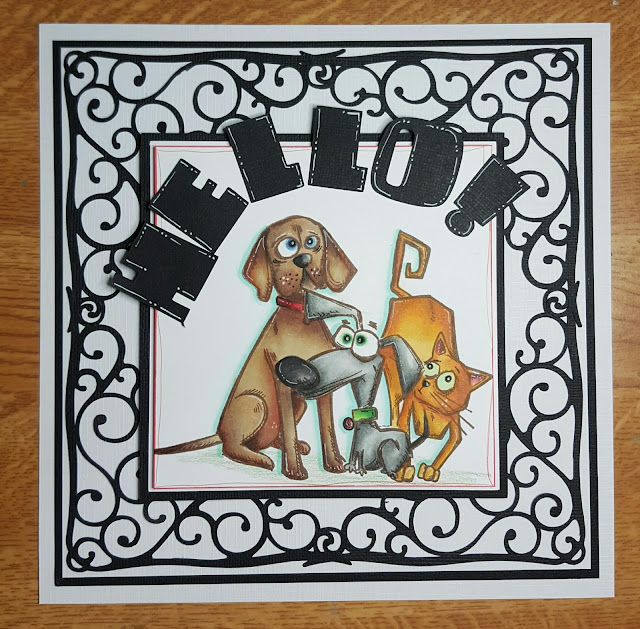
This card is not as simple as the first one, as I had to do some masking off and stamping over with different stamps. If you haven't done this technique before, just ask, and I will try to do a little video tutorial for you. 

I used promarkers to colour the animals in - two from the dog set and a cat from the Crazy Cats. I am just in love with the characters of the animals - I can see elements of the stamps in my dogs and cats here - all crazy.. but cute!


The background was cut on the Scan and Cut again, using one of the Christmas corners from the USB. I cut it four times and joined them in the centres. Again, I used the machine to do the mats and layers and also the wording for the card. 


You can see where I have used the white gel pen on the images to add a few highlights. I also went around the outside of the inner frame with a red pen to doodle a little interior framework. This was because the doggy had a red collar on and I hadn't included any red anywhere in the card. This just sorta finishes it off. 

Well... that's it for now... I will be back to show you a few other things I've been upto... but for now, here's the shopping list for the things I used. Happy Crafting everyone!!!

SHOPPING LIST - SINGLE DOG

Momento Ink - Rich Cocoa Brown  (available from the Craft Barn)
Santoro Paper Pack - GOR 160109 (Available from Stuff for Crafts )
 Stampers Anonymous CMS5271 Tim Holtz  - Crazy Dogs (Available from Craft World)
Promarkers - (Available from Art of Craft)
Raw Sienna, Cocoa, Burnt Sienna, Marsh Green, 
Pear Green, Cool Grey 5, Baby Pink, Antique Pink 
White gel pen
Black card stock
White base card 8 x 8 inches
Offcut of green ribbon
One fancy button
Black Nuvo Drops or black pearl gems

SHOPPING LIST FOR GROUP CARD

Momento Ink - Rich Cocoa Brown (as above)
Stampers Anonymous CMS 5271 Tim Holtz Crazy Dogs (as above)
Stampers Anonymous CMS 251 Tim Holtz  Crazy Cats (follow link as above)
Post it notes to use for masking of stamps
Promarkers (available from Art of Craft, as above)
Sandstone, Cinnamon, Henna, Cool Grey 1, Cool Grey 3, Cool Grey 5
Red Poppy, Leaf Green, Marsh Green, Denim Blue, Mustard, Gold
Raw Sienna, Baby Pink, Antique Pink
Black card 
White card blank 8 x 8 inches
Red fineliner pen
White gel pen

Monday 26 September 2016

A little bit of prettiness.

Hello again...

Crafting influx here we come!

As I said previously, having a little bit of spare time on my hands has meant that I've been able to look at all the stash I have in my room - clear a little bit out for charity, sort some out to sell, and regain a bit of space! - and get crafting doing things I've missed for a while.

I've had a new sewing machine sat in my room alongside the new overlocker that's never seen light of day since I bought it, and I decided to get it out. Do some sewing and get creative. I want to make a quilt. I tried - disaster. So. I decided to make a doll. On the second attempt (after the initial "I know what I'm doing, let's just get her cut out!") I read the instructions, followed them religiously and she turned out pretty well if I say so myself.


She was a kit from the Bobbin Patch, and was very easy to make (once you read the instructions. lol)
This dolly was called Totti, But I think I prefer to call her Dolly. She has a sweet little face with painted details, so is perfectly safe for kiddies too. I opted to use some acrylic paints that I picked up from the Works - just a cheap set - but you could use any acrylics you have at home.


I chose not to paint on her black shoes, as I like her stripy stockings just the way they are. She even has little bloomers on under her skirt - sweet or what?!

The dress is also very easy to make, and the pattern pieces and instructions are really easy to follow - but remember to read them and take note of the seam allowances. Some are included and some are not.

So, I will leave you with little dolly Totti, and get on with uploading another bit of crafty stuff that I have been making.

Until next time - Happy Crafting all!!!

Thursday 22 September 2016

It's been a while.... so let's get this started again....

Oh dear... my poor, neglected little bloglet.

I didn't realise it was quite so long since I had been on here to do anything at all with it! So, for those who are still hanging on in the vague hope that I may one day post something again - here you are! And THANK YOU for staying and being faithful to my blog (even if I do feel like I abandoned it!)

As it's been quite a while, I guess there's lots to tell you - DD graduating from uni to become a fantastic nurse (if I say so myself - and she moved to Manchester *sad mummy*), my other DD becoming a besotted mummy to our latest little Grandfurry, Charlie the pupster. A wonderful holiday to Somerset, lots of furry playtimes and snuggles, lots of crafting *ahem* and new windows!

See, the list is never ending now!!!

So. Where to begin.

Well, as you may have guessed, I left my job at Tonic at the beginning of the month, so time has been my own since then. It's taken a little bit of getting used to - watching tv, playing researching on my phone for a new hobby, and having lots of cuddles with baby Charlie the pup. Here he is, looking adorable.


 This was taken in his garden, at home where he lives with mummy and daddy Austin - Lannon. He's well at home, apart from the fact that Daddy Lannon plants nice flowers and shrubs and little C decides to pull and chew at them... bad puppy!


But who could resist that cute little sweetie smile?!


He often goes around to see his Uncle Leyton and Aunty Carly... and also sees his Aunty Carley here when she comes back from Manchester. But his all time favourite pastime is being good and acting really cute to get treats for his big cousins!


He is such a little cutie. And he loves his nanna and grandaddy lots. Even if it is just for the water bowl after a long walk, and a few treats along the way!

Well... I think that's enough waffling from me for now... I will share a few things that I've been making, and try to update my blog layout so things are a little easier to find from now on. 

I'm on a roll I tell thee.... I'm on a roll!!!

Friday 1 July 2016

ooooh my giddy aunt.....

I can remember that phrase from a long time ago..... and I haven't said it in quite a while!! However... it came to mind this morning when I looked at how long it was since I managed to get on the ol' blog and do a post... 

Life has been a bit busy - what with gardening, work, furbabies and other family things, time just seems to fly. But in a good way, the garden is looking like an abundance of leafy goodness, work is steady and coming together, the furbabies are contented, spoiled and all the rest of it, and family are as bonkers as ever. 

Perfect!

So... today, I thought I would finish this post for you that I started a while ago, and share this project with you. 

I created it using the envelope dies that came out a while ago now (listed at the end of the post) and I kept it quite simple with a stamped sentiment and a bit of a drop shadow. 


Firstly, you will need to use the larger central die from the set, and cut it from white and also from your darker shade of pink. 

Layer these together, sightly offset to create a drop shadow effect. Trim around the edges to make them nice and even. Take a lighter shade of pink and attach the top lacey layer using foam pads for dimension. Trim the edges so they are nice and even. You can do this with scissors. 

Cut out a slightly larger base of mirror card, leaving around a 2mm border all the way around. Stick underneath your panel. 


Mount this onto your card blank using 3d foam pads. Nsxt you will need to stamp your sentiment, or whatever it is that you choose to include onto the front. You can also add some paper flowers or just a bow to keep it simple - it will look classy and beautiful just as it is. 

I hope you like the quick and easy project today... these dies are just amazing and as you can see, are not just for envelopes. 

Here are your dies you need... have a fantastic day everyone!!

Shopping List

White cardstock
Light pink cardstock
Dark pink cardstock
3D foam pads
White card blank
Silver mirror card


Monday 20 June 2016

MERRY HO HO HO.......

Hello everyone.. and Merry Christmas!

I know it's not exactly Christmas, but here, in creating world, it has been for the past few weeks as we've been trudging away through the snow (aka debris on the craft floor) to bring you some fantastic samples using the Christmas Pick of the Week Rococo dies. Have you seen them?

Oh my word..... they are right up my alley! Cute, sweet.... what more could you ask for? So today, I thought I would share my little Reindeer with you.


Isn't he just the sweetest little guy? I think he's adorable, but I did leave him until last to work with him because I knew I would be using him alot if I didn't. 

For the background of the card I used one of our older dies, but you could use corners, stamps, papers, anything you wish really... but I wanted to keep the colours quite neutral. I added a layer of green to the background as I was using this in my front panel of the card. 


As you can see from the close up here, I cut out the little guy from darker brown cardstock, then stuck him onto lighter card and cut around. I also stuck another layer onto darker card to cut out the mouth area and the feet. I paper pieced the scart using bits of green and red.

I do love a little white gel ink too on my cutey characters... and this one didn't escape it. So, he got the obligatory eye highlight and litle highlights on his scarf, feet, nose and ears. I think it just adds a little brightness.

I hope you like the card... it's quite an easy, quick one to make... but I'm sure you've seen lots of our little Reindeer this week. I love him, and I'm sure you do too!

Friday 10 June 2016

Thank you for coming along to create.... a little tutorial.

Well Good Morning everyone... 

How are we all? Enjoying the lovely weather? It's been a tad hot for me, but still nice to be able to get the fresh air and sunshine around the garden. 

Today, I just want to say thank you so much for all the lovely folks that came along to Bolton Arena to visit the Hunkydory show, and came along to spend a little time on our stand to do the workshop to create this card. 

Everyone was so lovely - even though the temperature went up and up throughout the day - it was great to spend some time with you all for a chat, a laugh and to share our different crafting experiences. 

Anyway, here is the card that we made, and we chose to focus on the Sew Pretty dies. So here is a little step by step for those who would like to recreate the card. I hope you enjoy it.  


Firstly, you will be using the corner dies to cut out of white cardstock. You will need four of these, and you can back them onto a colour card of your choice. I decided to back them onto black, but if you are using a black layer underneath you won't need to do this piece. 


Cut around the outside edges of the diecut with your scissors - there is no verso edge with these dies, but it is so easy to trim out. 


Next, prepare your flower.You can choose to use either of the Posie dies - Perfect Posies or Tangled Posies - to do this.   You will cut two of the flower dies and cut them out as shown. On the first one cut out the very middle, on the second one cut out the inside section. This is so we can layer them up to add some dimension. Layer onto your cardstock and cut around the outside edge to give it some colour. 


Now is sticking and creating time. Attach your corners - opposites first, so when the corners cross over it looks nice and neat. 

Take your white card blank, cut from an A4 card scored in half and trimmed square to 14.5cm x 14.5cm. Your black layer will be trimmed to 14 x 14cm and the corners stick on top of this. 


Here is your finished background. Just perfect to place your finished flower into the centre. 

Cut out some layers of cardstock to match in with your chosen colour theme, to fit into the centre of the card. You can cut at 8cm, 7.5cm square and 7cm square and mount these into the middle.


To finish, place your little flower in the centre. Add a sentiment if you choose to... decorate with Nuvo drops.... add a gem or two for a bit of sparkle - the choice is yours!

I hope you enjoyed the little tutorial and manage to follow it okay. Any questions, just ask!

Shopping List 

Tonic Studios Sew Pretty - Admiral Arches 1222e
Tonic Studios Sew Pretty - Perfect Posies - 1220e 
Tonic Studios Sew Pretty - Tangled Posies - 1224e
Animated Social Gadget - Blogger And Wordpress Tips